How to clean a built-in grill
Brush while warm, pull the grates, degrease the burners, empty the tray. The full safe routine.
What to buy (Prime-ready)
One grate tool and one degreaser cover the whole routine. Pick the brush or the stones, not both. On a budget? A crumpled foil ball scrubbed across warm grates is a free stand-in. Delivery dates show on Amazon and vary by area, so check at checkout.
Heads up: The product links on this site are affiliate links. If you buy through them, Grill Patrol may earn a small commission at no extra cost to you. We only point to gear we’d put on our own grill. Disclosure.
-
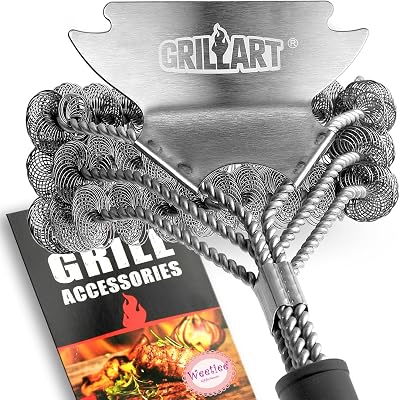 For the grates
Bristle-free grill brush + scraper
The Step 2 tool. The coiled head scrubs warm grates with no loose wire bristles to end up in food, and the scraper edge lifts baked-on carbon. You need this or the grate stones below, not both.
-
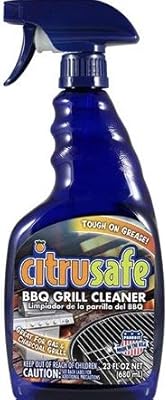 For the tray and burners
Citrusafe grill cleaner
Steps 3 and 5: the heat tent soak and the grease tray wipe. A food-safe citrus spray that cuts the grease pooling under the burners and fueling flare-ups next to your outdoor kitchen. Apply to a cool grill, let it sit, then rinse.
-
 Swap for the brush
Maryton Grill Stone Cleaning Brick (3-Pack)
Prefer scrubbing to brushing? Run one pumice block along each warm (not screaming-hot) bar and it strips carbon with nothing that can shed a bristle. This replaces the brush above on grates; it is not an extra you also need. One block lasts many cleans.
Want the full picture before buying? The bristle-free brush guide and the grill cleaner guide compare every option, and the deep-clean walkthrough shows where each tool goes.
A built-in grill is plumbed into your outdoor kitchen, so a grease fire here is a fire next to your house. The Patrol treats built-ins as safety-first: degrease thoroughly and never let the tray fill.
The full routine
- Fire it up for 10 minutes to burn off residue, then turn it off and let it cool to warm. A short burn-off carbonizes stuck-on food so it brushes away, and cleaning at warm (not blazing) protects your hand and the grates.
- Brush the grates with a bristle-free brush while warm. No wire bristles, ever. One detached bristle in a burger can mean surgery, and on porcelain-coated grates a metal tool chips the finish and invites rust.
- Remove the grates and heat tents and soak them in hot, soapy water. For heavy carbon, use a grill degreaser and let it sit rather than scrubbing the coating off.
- Scrape the burner shields and clear the burner ports. Blocked ports cause uneven flame and flare-ups; clear each port with a thin wire or a toothpick.
- Empty and wipe the grease tray. A full tray is the number-one cause of grease fires, and on a built-in that fire is against your structure. Empty it every few cooks.
- Wipe the interior, reassemble, and run a 10-minute burn-off to dry everything and confirm the burners light evenly.
The Guardian’s pre-cook inspection
Grates brushed and bristle-free, tray empty, ports clear, no flare-up fuel pooled under the burners. Four checks, thirty seconds, then cook.
Need the right tools? See the safest bristle-free grill brushes.
Print it: the built-in clean checklist
This routine on one page, plus the 30-second pre-cook check. Print it, save it as a PDF, or keep it on your phone.
Email is not switched on yet.
We have not turned on email delivery, so your address was not saved. The checklist is ready now and needs no email: open the printable checklist →
You are on the list.
The checklist is headed to your inbox. Every email comes from Grill Patrol (Alliterate Labs) and carries an unsubscribe link in the footer.
That did not go through.
Nothing was sent. The checklist needs no email: open the printable checklist →
The three tools this routine uses
These are affiliate links. Grill Patrol may earn a commission at no extra cost to you. Disclosure.
- Bristle-free grill brush + scraper The step 2 tool. Scrubs warm grates with no wire bristles to end up in food. Check it on Amazon →
- Citrusafe grill cleaner The soak-and-wipe degreaser for the heat tents and the grease tray. Check it on Amazon →
- Maryton Grill Stone Cleaning Brick (3-Pack) Swap for the brush if you prefer scrubbing. Pick one, not both. Check it on Amazon →
FAQ
Brush the grates after every cook while still warm. Empty the grease tray every two to three cooks — on a built-in, a full tray is a fire risk against your outdoor kitchen structure, so err on the side of frequency. Pull the grates and heat tents for a full soak and deep-clean two to three times per season, or whenever you notice uneven flames or flare-ups.
The cleaning steps are nearly identical, but the safety stakes are higher. A built-in grill is plumbed into a fixed outdoor kitchen, so a grease fire from a neglected tray is a fire adjacent to your house. Degrease more thoroughly and empty the tray more frequently than you might on a portable grill. Everything else — brush the grates, clear the burner ports, soak the grates — follows the same routine.
Turn off the gas and let the grill cool completely. Remove the grates and heat tents to expose the burner tubes. Inspect the ports along each tube for spider nests, grease deposits, or rust. Clear each blocked port with a thin wire, a pipe cleaner, or a toothpick. Do not use water or liquids inside the burner tube. Reassemble, then run the grill for 10 minutes and check that the flame is even and blue along the full length of each burner.