How to clean a beat-up gas grill
About an hour · 7 steps, a couple of them messy · turns a curbside hand-me-down into a grill you trust
A free grill is almost always a greasy, rusty grill: the one your neighbor left at the curb, or the one that sat under a torn cover for three winters. The good news is that the parts that get ugly (grates, heat tents, grease tray) are cheap and easy to bring back, and the parts that matter for safety are easy to check. Before you spend a dollar, you want to know two things. Is the firebox solid, and do the burners still light evenly? The CPSC recommends a safety check before the first cook of the season, and a rescued grill is exactly the case it is written for. This guide gets it clean and tells you the moment it is cheaper to walk away.
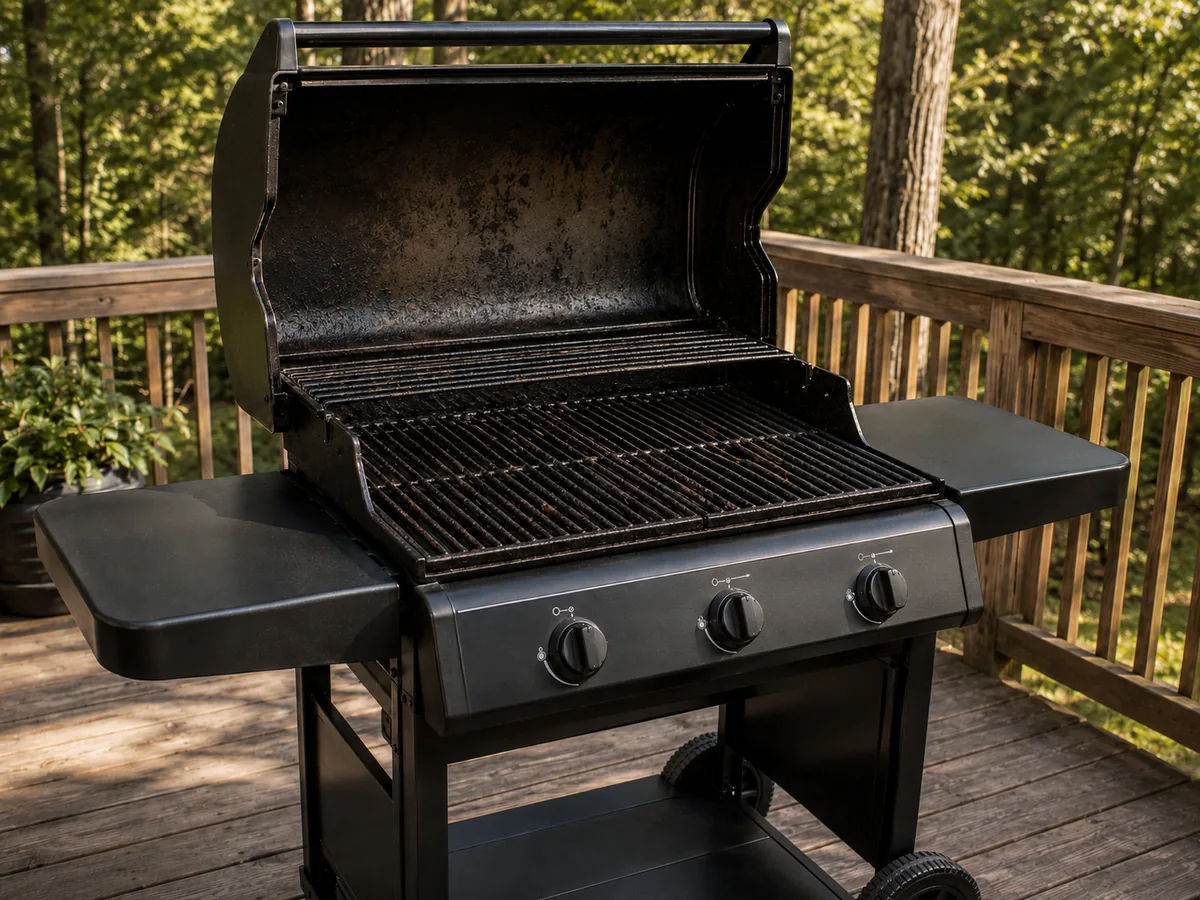
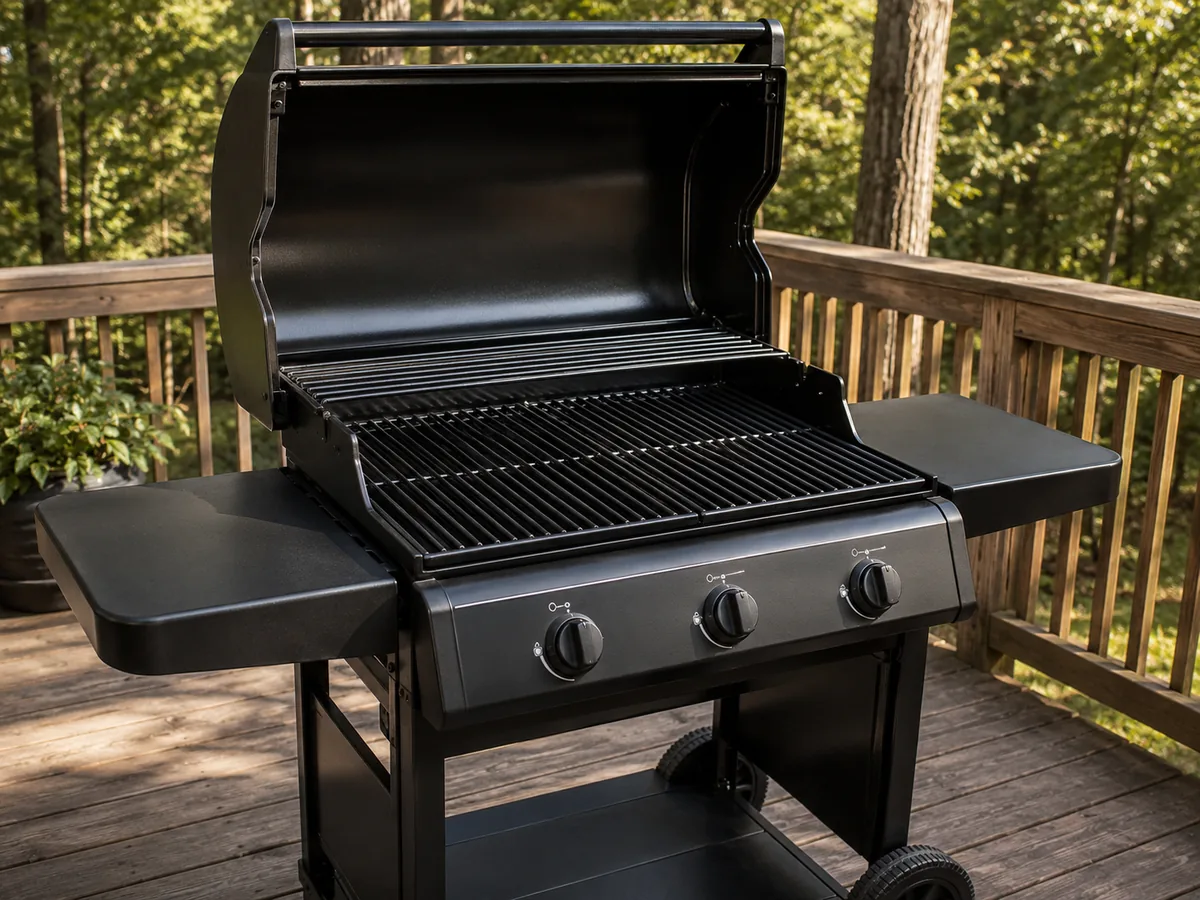
The same grill, before and after a deep clean: grease-caked grates on the left, scrubbed back to bare metal on the right.
At a glance
An hour of work turns a curbside hand-me-down into a grill you trust. The ugly parts are cheap to fix. The two things that decide save vs. replace are fast to check.
- Time
- About 1 hour
- Difficulty
- Moderate
- Tools
- 3 items
- Safety
- Leak test first
- 1 Check firebox, burners, and gas line (save vs. replace verdict)
- 2 Disconnect gas, strip the grill, and soak grates
- 3 Scrape and degrease the firebox
- 4 De-rust the grates without wire
- 5 Clear the burner ports
- 6 Clean the grease tray and drain
- 7 Reassemble, leak-test, then burn off
Is it worth saving?
Short answer: yes, if the firebox is solid and the gas line is sound. Grates, heat tents, and grease trays always look the worst and matter the least. Every one of them is cheap to scrub or swap. Spend ten minutes on the three parts that actually decide rescue vs. replace.
Walk away if the firebox has rusted through, if burner tubes are corroded thin or split, or if the gas hose and regulator are cracked, brittle, or gnawed. Those failures make the grill unsafe. Ugly grates, a greasy lid, or a caked grease tray are not reasons to replace anything.
The restore kit: gear for the rescue
Most of a rescue is elbow grease and things from the garage: foil, a bucket, dish soap, an old putty knife. These three earn their place because a neglected grill needs real degreasing and you'll be handling rusty, greasy metal. One pick per job. How we pick: bristle-free and grill-safe only, cross-checked against the 2026 CPSC recall list. We tell you what to skip before what to buy.
Heads up: The product links on this site are affiliate links. If you buy through them, Grill Patrol may earn a small commission at no extra cost to you. We only point to gear we’d put on our own grill. Disclosure.
| Item | Job | Why it wins | Skip if |
|---|---|---|---|
| Citrus degreaser | Dissolve baked-on grease | Food-safe, spray-and-wipe on a cool grill | You have dish soap and a bucket (fine for light grime) |
| Bristle-free brush + scraper | Scrub grates to bare metal | Nothing snaps off into food; scraper lifts carbon crust | You are already using a safe foil-ball method |
| Heat-resistant gloves | Handle rusty metal and degreaser safely | Rated to 932°F, keeps grease and rust off your hands | You are working completely cold metal in cool weather |
-
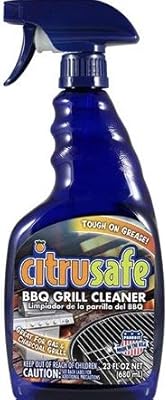 Start here
Citrus grill degreaser
A free grill is usually a greasy grill. This food-safe citrus cleaner cuts the baked-on gunk a brush can’t touch. It gets the layer that fuels flare-ups. Spray a cool grill, let it sit, wipe it down.
-
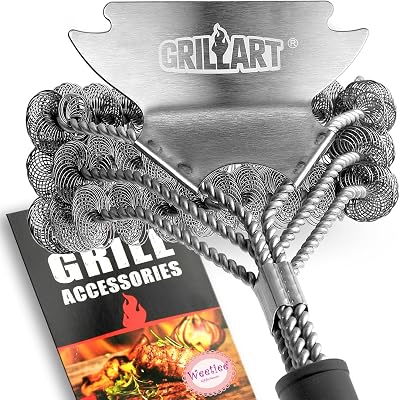
Bristle-free brush + scraper
Scrub the grates back to bare metal without wire bristles that can break off into food. The scraper edge lifts the carbon crust off the bars. The bristle-free head Grill Patrol keeps in its own restore kit.
-

Heat-resistant grill gloves
Restoring a neglected grill means handling rusty grates, greasy heat tents, and degreaser. Keep all of it off your hands. Rated to 932°F so you can work warm metal safely.
The rescue, step by step
Each step below has the short version up front and a deep dive if you want the detail.
Gas off, everything out
Close the tank valve, disconnect the regulator, strip the grill bare.
Deep dive
Before you touch a tool, close the tank valve and disconnect the regulator. A rescued grill may have a leaky line, and you want zero fuel in play while you work. Then strip it: lift out the grates, the heat tents or flavorizer bars, and the burner covers. Set them aside to soak. A beat-up grill comes apart easier than a clean one, because the grime is not holding anything together.
Grates soaking while you work the firebox
20 minutes of hot soapy water does more than 20 minutes of scrubbing.
Deep dive
Drop the grates and bars into a bucket or tub of the hottest soapy water you can run. Twenty minutes of soaking does more than twenty minutes of scrubbing. While they soak, move to the firebox.
Firebox degreased safely on a cold grill
Scrape loose carbon toward the drain, then spray a cool firebox with citrus degreaser.
Deep dive
Push the loose carbon and debris down toward the grease drain with a putty knife. Then, with the grill cool (the gas is already off from step 1), spray a grill-safe citrus degreaser on the walls, give it a few minutes to break the baked-on layer, and wipe. Never use oven cleaner or any lye-based cleaner. It pits and corrodes aluminum fireboxes and coated parts. Keep degreaser off food-contact surfaces and rinse anything near food with clean water.
Scrub the grates rust-free, no wire brush
Foil ball or pumice stone, dry completely, then a thin coat of oil.
Deep dive
Pull the soaked grates and scrub the rust back to bare metal with a crumpled foil ball, a pumice grill stone, or a bristle-free brush. For stubborn spots, a baking-soda-and-water paste plus a non-metal scrubber lifts it. Never a wire brush. A stray bristle in a burger is an ER trip. Dry them completely, then wipe a thin coat of cooking oil over the bare metal so the rust does not come right back.
Burner ports cleared so it lights evenly
A paperclip or stiff brush along each port is the step that decides whether the rescue works.
Deep dive
This is the step that decides whether a rescued grill lights evenly. Spiders and rust block the little holes along the burner tubes. Run a stiff bristle-free brush or a paperclip along each port until they are open, and clear the venturi tubes where the gas enters. Clogged ports are the number-one reason a hand-me-down lights on one end and not the other.
Grease tray clean, drain clear
Scrape out the hardened grease, clear the drain channel, reline with foil.
Deep dive
A neglected grill almost always has a full, hardened grease tray and a clogged drain channel, the exact fuel for a flare-up. Scrape it out, run a wadded paper towel or bottle brush through the drain until it runs clear, and reline the tray with foil so the next clean is lift-and-toss.
Reassembled, leak-tested, then burned off
Soapy water on every connection before first flame. Growing bubbles mean stop.
Deep dive
Put it back together dry. Reconnect the gas, and before lighting, brush soapy water on the hose and connections, open the valve, and watch for growing bubbles. Bubbles mean a leak, so stop and replace the part. No leak? Light it and run the burners on high for 10 to 15 minutes with the lid closed to burn off residue and confirm every burner lights evenly across its length.
What makes a rescue go wrong
| Mistake | Why it matters | Quick fix |
|---|---|---|
| Lighting before a leak test | A rescued grill may have a cracked or chewed gas line | Brush soapy water on all connections, watch for growing bubbles before first flame |
| Wire-bristle brushes on rusty grates | Weber recalled 3.2M+ brushes in Feb 2026; bristles shed faster on rust and end up in food | Use bristle-free, crumpled foil, or a pumice stone. Full stop. |
| Oven cleaner in the firebox | Lye corrodes aluminum fireboxes and coated parts | Use a grill-safe citrus degreaser on a cool grill |
| Judging the grill by its grates | Grates are cheap to swap and do not predict safety | Judge by the firebox and burners. Ugly grates save it. |
| Skipping the burner ports | Clogged ports are the number-one reason a hand-me-down lights on one end only | 5 minutes with a paperclip or stiff brush along each port |
The National Fire Protection Association (NFPA) ties most grill fires to grease buildup and leaks, the two things a beat-up grill has the most of. Clear those, rule out the unsafe parts in the checklist above, and a rescued grill is safe to fire up.
FAQ
Surface rust on the grates is mostly an appearance and flaking problem. Scrub it back to bare metal, season it, and you are fine. What is not safe is heavy rust or holes in the firebox, burner tubes, or gas line. If the metal flakes through or a burner tube is rusted thin, replace the part before you light it.
Usually, yes. Grates, heat tents, and grease trays are cheap to replace and easy to scrub. Two things decide it: is the firebox solid (no rust-through), and do the burners still light evenly after you clear the ports? If both pass, a free hand-me-down is worth rescuing.
Soak them in hot soapy water, then scrub with a crumpled foil ball, a pumice grill stone, or a bristle-free brush. For stubborn rust, a baking-soda-and-water paste plus a non-metal scrubber lifts it. Never use a wire brush. A stray metal bristle in food is an ER trip. Dry the grates fully and wipe with cooking oil to keep rust from coming back.
Restore if the firebox and burners are solid. Grates, bars, and trays are inexpensive parts. Replace if the firebox has rusted through, the burner tubes are corroded thin, or the gas valve or hose is cracked. Those are the parts that make a grill unsafe, not a grimy lid.
Keep reading
Keep it rescued
Once it's back to par, the quarterly deep-clean is what keeps the grease and flare-ups from creeping back.
The safest grill brushes
Bristle-free picks: the brush that scrubs a rescued grate clean every cook without the wire risk.
Grill Patrol rounds up honest, tested gear for rescuing and maintaining your grill. The restore kit is the short list of what helps bring a hand-me-down back to par.
See the restore kit →