The Hand-Me-Down Grill
Restore Checklist
Free. No email. Print it or keep it on your phone.
Our safety claims cite primary sources (CPSC, AMA). Picks are cross-checked against the 2026 CPSC wire-bristle recall. Live prices and ratings stay on Amazon, where they’re always current.
Step 1: Is this grill worth saving?
Work through this before you spend a dollar. One real dealbreaker, everything else is fixable.
Walk away only if:
- ✗ Firebox rusted through. You can see daylight through the bottom of the firebox. That is the one real dealbreaker. A rusted-out firebox is not replaceable at a sane cost.
Replaceable (keep the grill):
- ✓ Grates rusted, pitted, or flaking. Replaceable. This is the most common issue and the biggest upgrade you can make.
- ✓ Burner tubes corroded or uneven flame. Replaceable. Confirm your model before ordering (see 200 vs 300 guide).
- ✓ Igniter dead. Replaceable. Cheap fix. See the igniter troubleshooting guide first; sometimes it just needs a fresh battery.
- ✓ Just greasy or surface rust. Clean and keep. This is most hand-me-down grills. An afternoon of cleaning and it cooks like new.
Honest verdict: most hand-me-down grills are worth saving unless the firebox is gone. Everything else on this checklist is fixable with parts and an afternoon.
Step 2: Restore order of operations
Do these in order. Cleaning first means you can actually see what needs replacing.
- 01
Degrease
Spray a food-safe citrus degreaser on a cool grill. Soak the firebox, lid, and grates. Let it sit, then wipe it all down. This cuts the baked-on gunk that a brush cannot touch.
- 02
Scrape
Use a bristle-free brush and scraper edge on the grates. No wire bristles that can break off into food. Get to bare metal on the bars so you can see their real condition.
- 03
Deep clean
Pull the grates and Flavorizer bars. Scrape the inside of the firebox with a putty knife or stiff brush. Empty and wipe out the drip tray. You want a clean starting point for your inspection.
- 04
Inspect
Now that it is clean, check the firebox bottom for rust-through. Look at the grates up close for pitting or flaking. Click the igniter and listen. Shine a flashlight through the burner ports and look for blockages. Use the worth-saving list above.
- 05
Replace what is worn
Only swap what your inspection flagged. Rusted grates, a corroded burner tube, a dead igniter. Do not replace parts that still work. See the parts list below, or the full restore kit guide for the step-by-step.
- 06
Season and protect
Wipe a thin coat of high-smoke-point oil onto new cast-iron grates, then run the grill hot to burn it in. Repeat once or twice. Skip olive oil, its smoke point is too low and it turns gummy. This step is what keeps the new grates from rusting again.
Only clean and scrub on a cool grill. After any burner or hose work, brush soapy water on the gas connections and watch for bubbles before you cook. Bubbles mean a leak; no bubbles, you are good to light.
Heads up: The product links on this site are affiliate links. If you buy through them, Grill Patrol may earn a small commission at no extra cost to you. We only point to gear we’d put on our own grill. Disclosure.
Parts and tools shopping list
Verified picks for the most common restore jobs. Buy only what your inspection flagged.
Clean it
The three tools to strip the grime, in order.
-
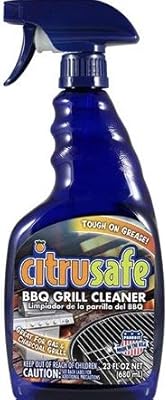 Start here
Citrus grill degreaser
A free grill is usually a greasy grill. This food-safe citrus cleaner cuts the baked-on gunk a brush can’t touch. It gets the layer that fuels flare-ups. Spray a cool grill, let it sit, wipe it down.
-
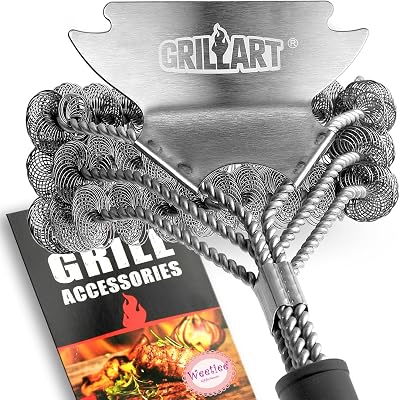
Bristle-free brush + scraper
Scrub the grates back to bare metal without wire bristles that can break off into food. The scraper edge lifts the carbon crust off the bars. The bristle-free head Grill Patrol keeps in its own restore kit.
-

Heat-resistant grill gloves
Restoring a neglected grill means handling rusty grates, greasy heat tents, and degreaser. Keep all of it off your hands. Rated to 932°F so you can work warm metal safely.
Fix it
The three things that wear out on a front-control Weber Spirit E-210. These ASINs are verified for that model only. Not sure if you have a 200 or 300 series? See the 200 vs 300 guide.
-
 Biggest upgrade
Cast-iron cooking grates (Spirit E-210, 200-series)
Rusted, flaking grates are the number-one reason a free grill cooks badly and sticks. A fresh set of cast-iron bars brings back the heavy, even sear the grill had when it was new. These are the 200-series size that fits the E-210, not the wider 300-series, so confirm your model before you buy.
-

Stainless replacement burner tube (front-control E/S-210)
If the flames are uneven, weak, or creeping toward the control panel, the burner tube has rusted at the ports. This stainless replacement restores a full, even flame across the grates and outlasts the factory steel one, so you only do this once. Fits the front-control Spirit E/S-210.
-
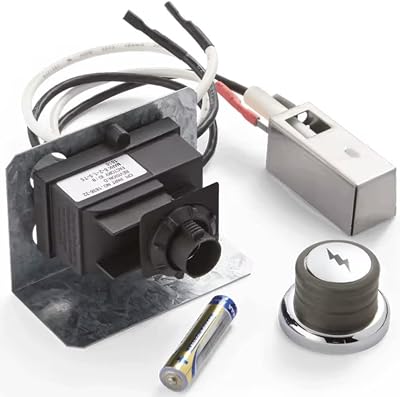
Weber igniter kit (Spirit)
A dead igniter is the first thing to go on an old grill and the cheapest annoyance to fix. This genuine Weber kit gets you back to a one-click light instead of fishing for a lighter. Quick swap, big quality-of-life difference every cook.
Season and protect
Protect the new grates so you never have to rescue this grill twice.
-
 Season it
High-smoke-point canola oil (1 gallon)
New cast-iron grates need a thin coat of high-smoke-point oil and a burn-in so they shed food and shrug off rust. A gallon seasons grates, griddles, and cast-iron pans for a long time. Skip olive oil here; its smoke point is too low for grates.
-

Cotton bar mops (12-pack)
Cheap cotton towels you will not mind getting greasy. Use them to wipe the seasoning oil on, buff the grates, and keep around for every cook after. A 12-pack outlasts a roll of paper towels by months.
-

OXO Good Grips 12-inch locking tongs
The one tool you will reach for the second the grill is back in service. The locking 12-inch tongs have the reach to work a hot grate and the grip to actually turn food. Buy once, use forever.
The parts above are verified for the front-control Weber Spirit E-210 (200-series, 2013 and newer). For the 3-burner E-310/320/330, see the Spirit 300 parts page. For other brands, use the Amazon search links on each PickCard above to find grates and burners matched to your model.
Keep this checklist with you at the grill.
FAQ
Work in this sequence: degrease first (spray the whole interior with a food-safe citrus degreaser on a cool grill and let it soak), scrape the grates and firebox walls, deep-clean by pulling the Flavorizer bars and emptying the drip tray, then inspect the firebox bottom and burner tubes once everything is clean. Only after you can see what you are working with should you decide what to replace. Clean before inspect, inspect before buy.
Almost always yes. The one deal-breaker is a firebox that has rusted all the way through — if you can see daylight through the bottom, the cost of a replacement firebox exceeds the value of the grill. Everything else (grates, Flavorizer bars, burner tubes, igniter) is a consumable you can replace for less than the cost of a new grill. Surface rust, a dead igniter, or corroded grates are all routine restores, not reasons to walk away.
Plan for two to four hours for a thorough restoration that includes degreasing, scraping, deep-cleaning, inspection, and re-seasoning — assuming no parts need ordering. The degreaser soak takes 15–30 minutes of waiting, which accounts for most of the clock time. If your inspection flags worn grates or a corroded burner tube, add time for parts to arrive and another 30–60 minutes for installation. Most grillers can take a neglected hand-me-down from grimy to cook-ready in a single afternoon.
Yes, for cast-iron grates — and it is the step that determines whether they rust again within weeks or stay protected for years. Once the grates are clean and completely dry, wipe a very thin coat of high-smoke-point oil (such as canola or flaxseed) over the entire surface, then run the grill on high with the lid closed for 15–20 minutes until it stops smoking. Repeat once or twice. Thin coats polymerize into a protective layer; a thick coat turns sticky instead of curing properly.
Go deeper
-
Full restore kit guide
The step-by-step guide with more detail on each move. Includes the Weber Spirit E-210 model check.
Read it → -
Igniter not sparking?
6 fixes from free to part replacement, in order. Start here before buying anything.
Read it → -
Weber Spirit 300 parts
Exact-fit grates, burners, and Flavorizer bars for the front-control E-310/320/330.
Read it → -
200 vs 300: which Spirit do you have?
A 30-second check so you order the right parts the first time.
Read it →